Crop and split book scan in 3 commands
Obsah
Command line processing of multipage book-type scanned documents with ImageMagick.
TL;DR:
convert -density 300 orig-scan.pdf pages.png
convert `ls pages-*.png` -crop 3704x1852+160+20 +repage -crop 50%x100% pages-split.png
convert `ls pages-split*` -page 100%x100% result.pdf
Imagine you have scanned part of a book or some other material consisting of multiple pages and the resulting document is a PDF where every page contains two facing pages of the original book. Morever, there are ugly borthers you don’t want either.
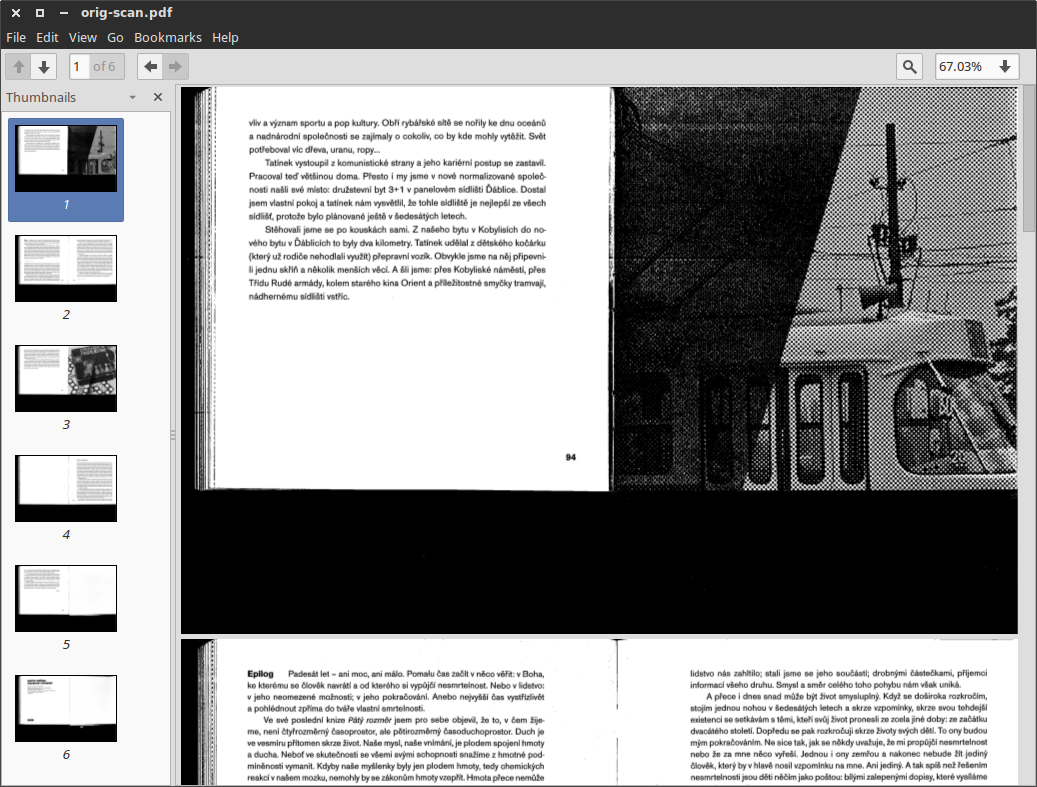
Now, the result you want is a clean PDF with one page of the book per page in the PDF. I’ll show here what to use to achieve that (quality of the output and amount of adittional work depends on how carefully you scanned the book).
You will need convert, which is on most Linux machines, I think. If not, try ImageMagick website. Since we won’t use another tool here, there’s a good chance, that this tutorial applies not only to Linux and Mac, but roughly to Windows, too.
One little warning — ImageMagic doesn’t support multithreading and it’s not exactly fast, so depending on the number of pages in your scan, the operations might take VERY long time. For large documents, try using the -monitor option.
Step 1.: PDF to image sequence
Note: If you opted for image sequence output from your scanner rather than PDF, you can skip this part.
This essentially takes every page from PDF and saves it as an bitmap image. (And it actually works even for text documents, not only PDFs consisting of images.)
convert -density 300 orig-scan.pdf pages.pngThis will result in sequence of files like pages-0.png pages-1.png pages-2.png, because ImageMagick is very smart. If your implementation by any chance overwrites the output, try pages-%02d.png instead of pages.png in the command above.
The -density 300 is DPI setting. If you don’t want to OCR it later, you can use 300 or even less. For OCR, use at least 400 (if the orig. scan has high enough resolution). There’s no „original“ setting, as far as I know.
If you want to extract only selected pages from the PDF, use e.g. orig-scan.pdf[0-13] (this extracts 14 pages, 0–-13).
Step 2.: Cleaning (cropping) and splitting the pages
Very often, you might need to crop the pages because the scanning area was larger than the book (in my case, the black borders). When you’re careful during scanning, the crop will be same for all the pages, so you can use a batch crop.
I suggest you open one of the pages in Gimp or similiar software to make the measurements for cropping. You will need resulting width and height, and X and Y offsets. See image below for explanation.
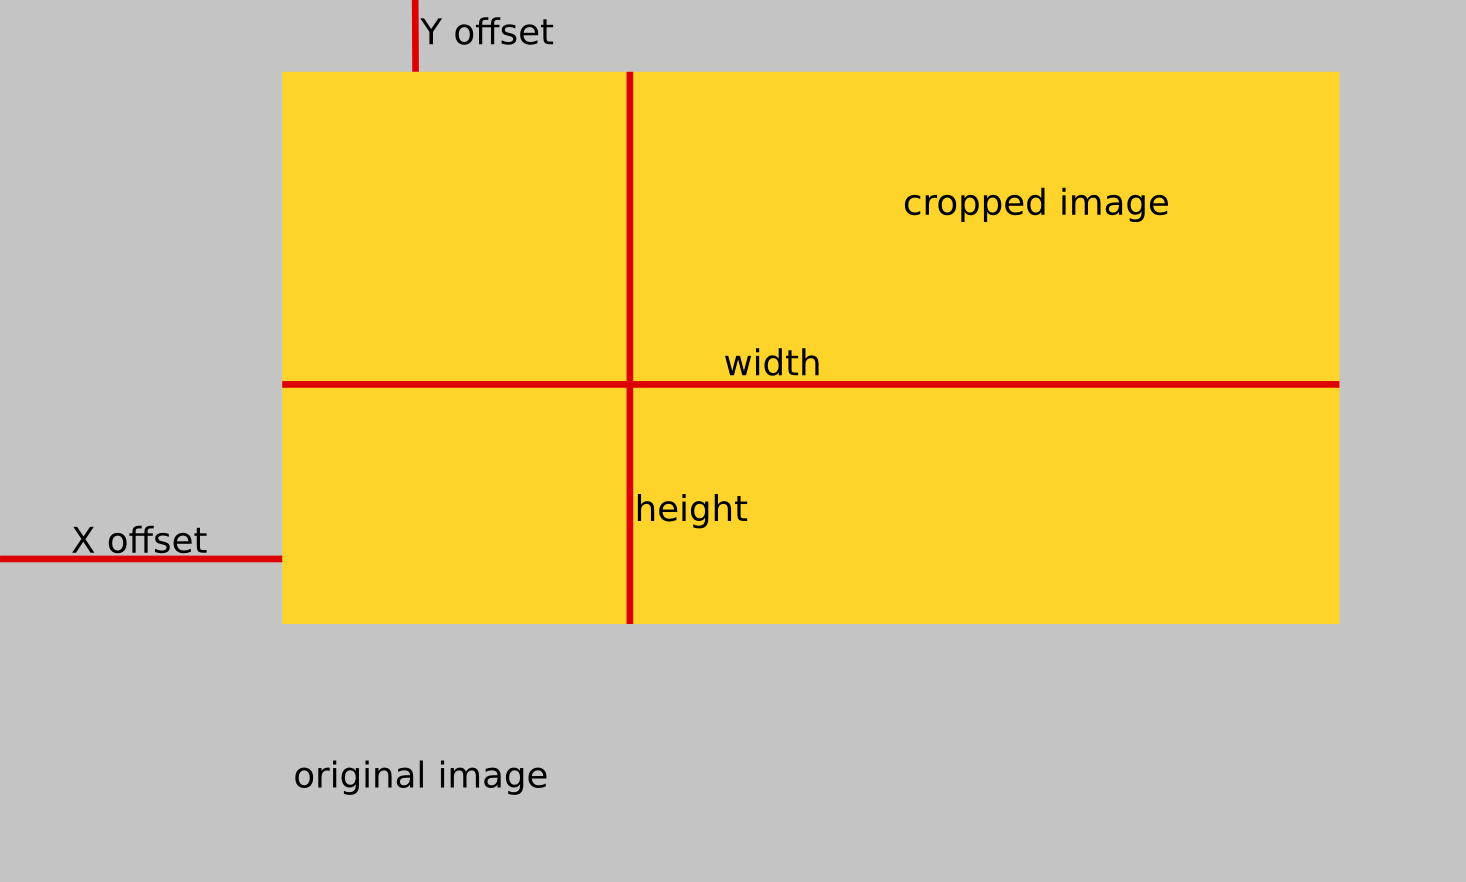
I will leave the actual measuring to you. If you can’t do that, you probably don’t need any of this. (OK, I’ll be nice — try selecting desired region and hover with mouse over relevant points, you’ll see coordinates in the Gimp’s status bar on the bottom of the screen.)
convert `ls pages-*.png` -crop 3704x1852+160+20 +repage -crop 50%x100% pages-split.pngSo, this takes all the PNGs (I use `ls` because ImageMagick screwes the sorting), crops them to 3704×1852 px starting at 160×20 px, then repages (that’s resetting positions after crop) and splits the images to two in the middle. For debugging, I suggest leaving the -crop 50%x100% out.
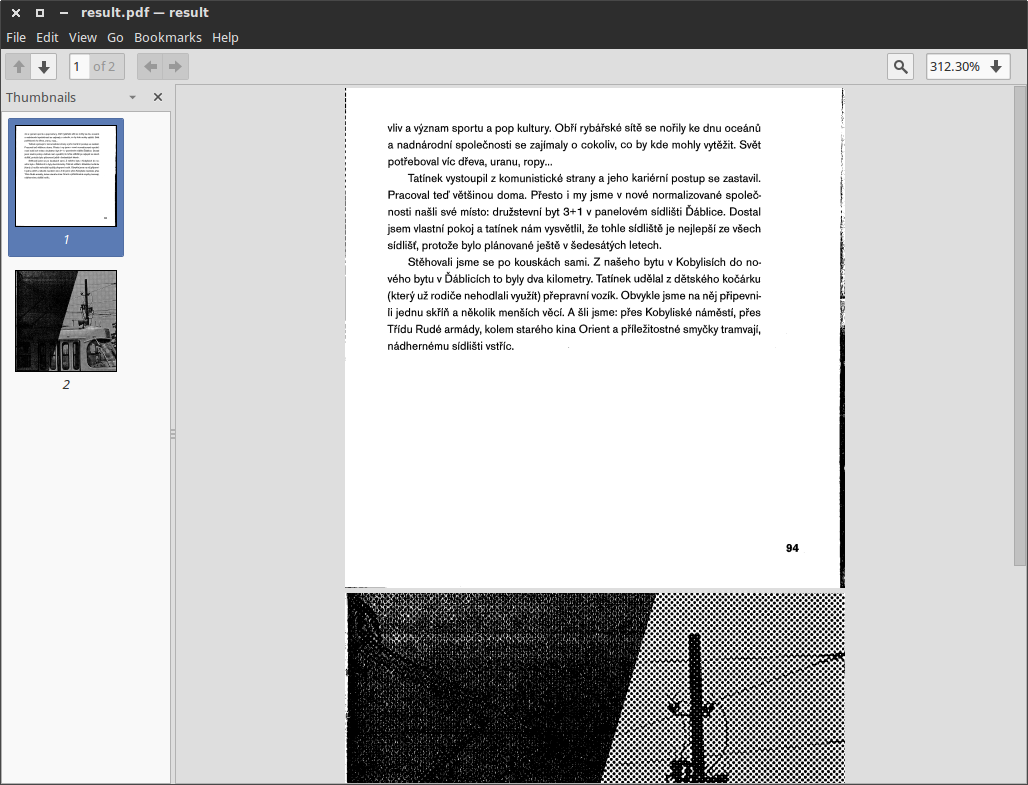
Step 3.: Recombining back to PDF
Now we have all the single pages, we can put them back to PDF.
convert `ls pages-split*` -page 100%x100% result.pdfIt is kinda important to set the page size correctly, which I consider a bit of magic, but basically — try it without any setting, if it doesnt work, fiddle with it until it does what you want. Here’s the reference Image Geometry.
That’s it. Hope you enjoyed the ride.